Tag Archives: first-aid for dogs

First Aid For Dogs Part 2: Performing CPR

By Kelley Kombrinck

A border collie puppy is lying with his belly up on a table, looking happy and cute. There is an unrecognizable veterinarian petting him. She is wearing a stethoscope and blue scrubs inside a veterinarian clinic.
Emergency care for a sick puppy

Welcome back to our three-part series on first aid for dogs and how (and just as importantly, when) to use it. In our first post we discussed some different scenarios where it may be necessary to provide emergency assistance for your beloved four-legged family member. In this installment, we will discuss performing CPR on your dog, how to know when it is necessary, and how to do it.

What is CPR? The American Heart Association says, “CPR – or Cardiopulmonary Resuscitation – is an emergency lifesaving procedure performed when the heart stops beating. Immediate CPR can double or triple chances of survival after cardiac arrest.”  (check HERE for more info on human CPR.)

We’ve all seen it on TV, movies, or even in real life; someone receiving mouth-to-mouth resuscitation or chest compression to keep them going till they can be stabilized. Dog CPR is not dissimilar. It uses artificial respiration and chest compression to try and revive a dog whose heart has stopped, or who has stopped breathing. When the heartbeat or respiration stops, oxygen levels in the blood decrease quickly and quick, decisive action could save your dog’s life.

As always, of course, the best-case scenario in an emergency, is to be able to get your dog immediate professional, medical assistance. Sometimes, however, that is not easily accessible. If you find yourself in a situation where help is not close by, here are some steps you can take to potentially help your fur-friend hold on until help is available.

Assess Your Dog’s Situation:

If possible, before you do anything, call the veterinarian or animal hospital and alert them that you have an emergency and will need help.

Dog has stopped breating and so its owner, who know dog first aid, is performing mouth to mouth resuscitation to save his life.

checking to see if your dog is responsive, try to remember, A-B-C, which stands for “Airway, Breathing, Cardiac.”

  • First, check your dog’s airway by opening its mouth and making sure there is nothing obstructing the throat. If something is blocking the airway it can make it difficult or impossible for your dog to breathe and may complicate further CPR efforts. Remove anything that is blocking the airway.
  • Next, ascertain whether your dog is breathing. This can be done by watching for the rise and fall of their chest, or by putting the back of your hand, or your cheek, close to its nostrils to feel the exhalation. If your dog is breathing, and there is nothing blocking the airway, you can stop CPR. However, if you are unable to identify respiration you will want to continue to the third step.
  • Look for a heartbeat. To do this, put your dog onto their right side and push their front elbow to the chest. This area, where the elbow touches the chest, is referred to as the “intercostal space,” and is the approximate location of your dog’s heart. If the heart is beating, you should see some movement. If you don’t see any movement, press your hand or fingers gently against that spot to see if you can feel a heartbeat.

If you find, after going through the A-B-C assessment that your dog is not breathing, or does not appear to have a heartbeat, you should begin CPR.

First aid reanimation on a small shetland sheepdog

Performing CPR

  • The first step is to get your dog ready to receive artificial respiration. On the floor or a table, line your dog’s head up with their back, and tilt back a bit further. This opens up the airway.
  • Once open, you will put your mouth over the airway. If your dog is small, meaning under 30 lbs. (13.6 kg), place your mouth over both the nose and the mouth. If your dog is any larger than this, only cover their nose with your mouth. For the larger dogs, you also want to try and hold their mouth and jaw shut to prevent air from escaping when you begin respiration.
  • Blow air in through your dog’s nose (or nose and mouth) enough so that you can see the chest rise, then take your mouth away so the air can escape back out. You want to try and do 20 to 30 of these breaths per minute.
  • Now you should begin chest compression. Place your hand over the heart, in the spot we discussed earlier, the intercostal space. Press down firmly so that your dog’s chest depresses to about 1/3 to 1/2 it’s normal depth. Try to do 10 to 12 compressions every 5 seconds, then doing 1 breath. This would mean, one breath—compress the chest 10-12 times to the count of five, then another breath, until you’ve done 20-30 breaths in a minute. This is a lot of intense compression and can be tiring. If possible, it is ideal to have someone else with you that can switch off with you every 2 minutes or so. You should also be checking every 2 minutes to see if your dog has begun breathing again. If respiration begins again on its own, you can stop CPR. If not, continue performing the CPR until you are able to get medical assistance.

Hopefully there will never be a need for you to have to take these steps for your sweet little fur-friend, but knowing how to perform CPR on your dog could possibly make the difference in helping them hold on till help arrives in the case of an emergency.

Check back here at the blog next month, in our 3rd and final installment of our First Aid for Dogs series, we will talk about what to do if your dog is choking, and some items you should have around the house to help care for your dog in an emergency.

For more first aid for dogs, you can read part 1 of this 3 part series HERE where we cover the basics of first aid for dogs. And for even more dog safety tips that could maybe help prevent some of these emergency situations, go back and see our blog on the foods dogs can’t eat, HERE.

miling mature woman giving her cog a big hug while sitting together outside on her patio in her back yard

First-Aid For Dogs

Part 1: Emergency Care

By Kelley Kombrinck

First Aid for Dogs
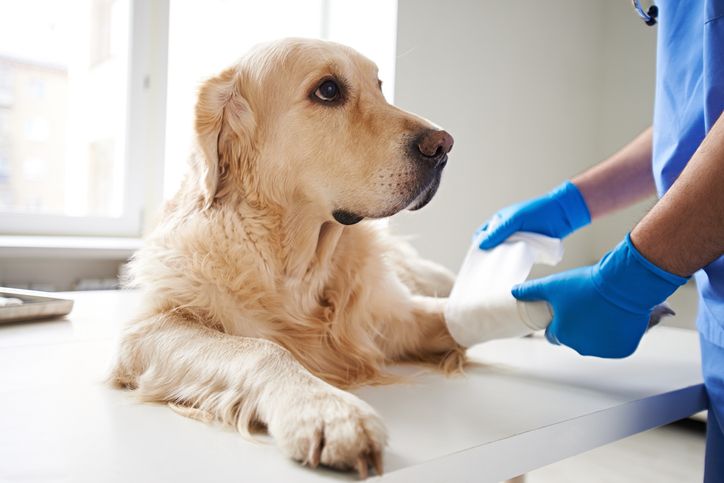
Veterinarian wrapping bandage around a dog’s leg

One of the things that charms us so much about dogs is their curiosity. They are inquisitive and explorative creatures who want to understand and interact with their surroundings. It is a very relatable, human trait that we find endearing. However, from time to time, it can also lead to our furry friends getting themselves into situations that could be potentially dangerous, or even life threatening.

Of course, any obvious, severe injuries, sickness or emergencies should be left to the expertise of your veterinarian, but sometimes quick action at home can help your dog be more comfortable and potentially stable until they can be seen by the vet. Occasionally too, there will be minor incidents that don’t require a trip to the animal clinic, but can, and should, be attended to at home.

In this 3-part series we will go over how to identify an emergency, some things you can do to help, pet CPR, and supplies you should keep around the house, just in case.

How to Know an Emergency

How to Know an Emergency

As always (and we will mention this more than once throughout this post), if there is any doubt, call the vet. They are trained to know what to look for and how to handle threats to your animal’s health.

It is important to know what constitutes an “emergency,” for your dog. The first part of identifying the severity level of a situation with your dog, is knowing what is normal for them. You should be familiar with their appetite, sleep habits, temperament, and bathroom habits. Any significant and ongoing change in any of these can be a sign that something is wrong. This is particularly true of their bowel movements. Changes in frequency, appearance or even odor can be indicators of serious problems.

However, sometimes there is an obvious problem that needs immediate attention from a professional. Below is a list of situations where you should seek veterinary assistance as soon as possible. If your dog(s) are experiencing anything from the list below, get them to the vet.

  • aren’t breathing or have trouble breathing
  • are unresponsive
  • have collapsed and can’t seem get up
  • having a seizure
  • may have broken bones
  • not moving as well as usual or lacking normal coordination
  • have possibly ingested something toxic
  • experience vomiting or diarrhea for over than 24 hours.

With that in mind, there are some things you can do to help your dog hang in there and be more comfortable until they’re able to be seen (if the problem is immediate and cannot totally wait).

Checking Your Dog’s Pulse

Checking Your Dog’s Pulse

There may come a time when you will need to check for your dog’s pulse. The vet on the phone may ask you if you can find it, and if so, what is the heartrate (beats per minute).

To find the dog’s pulse quickly, check the along their thigh, somewhere in the upper third. Place your hand over the top of their thigh and gently squeeze or press your fingers just underneath their leg, on the inside of the thigh. You should be able to feel a pulse.  NOTE: Try not to locate your dog’s pulse using your thumb. Your thumb also has a pulse and could mislead you on what your dog’s pulse actually is. Once you’ve found the pulse, time it for 15 seconds. You can then multiply by 4 to get the beats per minute.

Taking Care of Burns

Taking Care of Burns

Burns can happen in a variety of ways. If your dog gets a semi-serious to severe burn, the first step is to make sure you cool the wound/burn with water for about 10 minutes.  You don’t want to apply any dressings that will stick to the burn and if you are crating your dog on the way to the vet, just make sure you have a clean, smooth plastic surface for them to rest on. Sheets and blankies can also stick to burnt skin and will complicate treatment. Also, it is not recommended to use cling film with your dog.

Bleeding Claw

Bleeding Claw
Bleeding Claw

It’s important to care for your dog’s claws and clipping them can be tricky. It’s easy to clip them too far up and cause bleeding. If you have accidentally nicked the claw too far up and it starts bleeding, put an absorbent dressing over the paw and wrap the bandage securely (but not too tight) as far up their leg as you can so the dressing stays in place. Keep a close eye on your dog’s paw and if the bleeding doesn’t seem to be slowing or stopping, contact your vet.

These are just a few tips for helping keep your dog happy and healthy in case of an unfortunate injury or accident. You can find more safety tips on the Pet Stop blog in our article from 2012 HERE and be sure to check back in next month for part two of our dog First Aid series where we will discuss how to administer CPR to your pet and some other helpful hints.

A happy, healthy, beautiful dog